Isn’t it annoying when you have to provide your email address to many websites to get some information or create an account?
And then, all of a sudden, your inbox is bombarded with emails from such websites. Plus, one shouldn’t provide his/her email address everywhere.
Thus, many users create multiple email addresses for such work. However, this becomes a headache as you need to check and log in to multiple email accounts every time.
However, for iOS users, Apple has come up with a new feature named “Hide My Email” with iOS 15.
This is an amazing feature that lets you hide your email on the iPhone, yet it lets you sign up, receive, or send mail using the same email address.
Many iOS users are unaware of this fantastic security feature, so this article will explain what Hide My Email is, how to create an unlimited number of random unique email addresses on your iPhone, and how to use the Hide My Email feature on your iOS device.
What Is “Hide My Email”?
The name of this feature says it all. It hides your email address and keeps it safe from the eyes of hackers or advertisers.
Apple defines it as follows:
“Hide My Email lets you create unique, random email addresses to use with apps, websites, and more so your personal email can stay private. It’s built in to “Sign in with Apple” and iCloud+.”
Hide My Email is available with iOS 15 and an iCloud+ subscription. So, if you have bought even 50GB of iCloud storage space, you can use Hide My Email.
You will find it in Settings => Your Apple ID Profile => iCloud => Hide My Email.
Keep in mind that when you are using random email addresses created by Hide My Email, you are not creating new standalone email accounts.
Every email sent to that random generated email will be forwarded to your original email address.
Plus, when using the Mail app on the iPhone, you can also send a new email to anybody using a random unique email address generated by Hide My Email.
You can deactivate and delete these disposable email addresses whenever you want. This is good for those users who are searching for how to create disposable emails on their iPhone.
Now, you tell me, isn’t this amazing? Let’s see how to use this function.
How to Use Hide My Email on My iPhone?
As I stated earlier, you need to have an iCloud+ subscription if you wish to use this feature. If you have an active iCloud+ subscription, you will not need to turn this feature on manually as it will be active automatically.
There are three ways to create a random email address by using Hide My Email.
Options #1: How to Create Disposable Email Addresses on iPhone – Safari Browser
If you are using the Safari browser, you will see this option automatically.
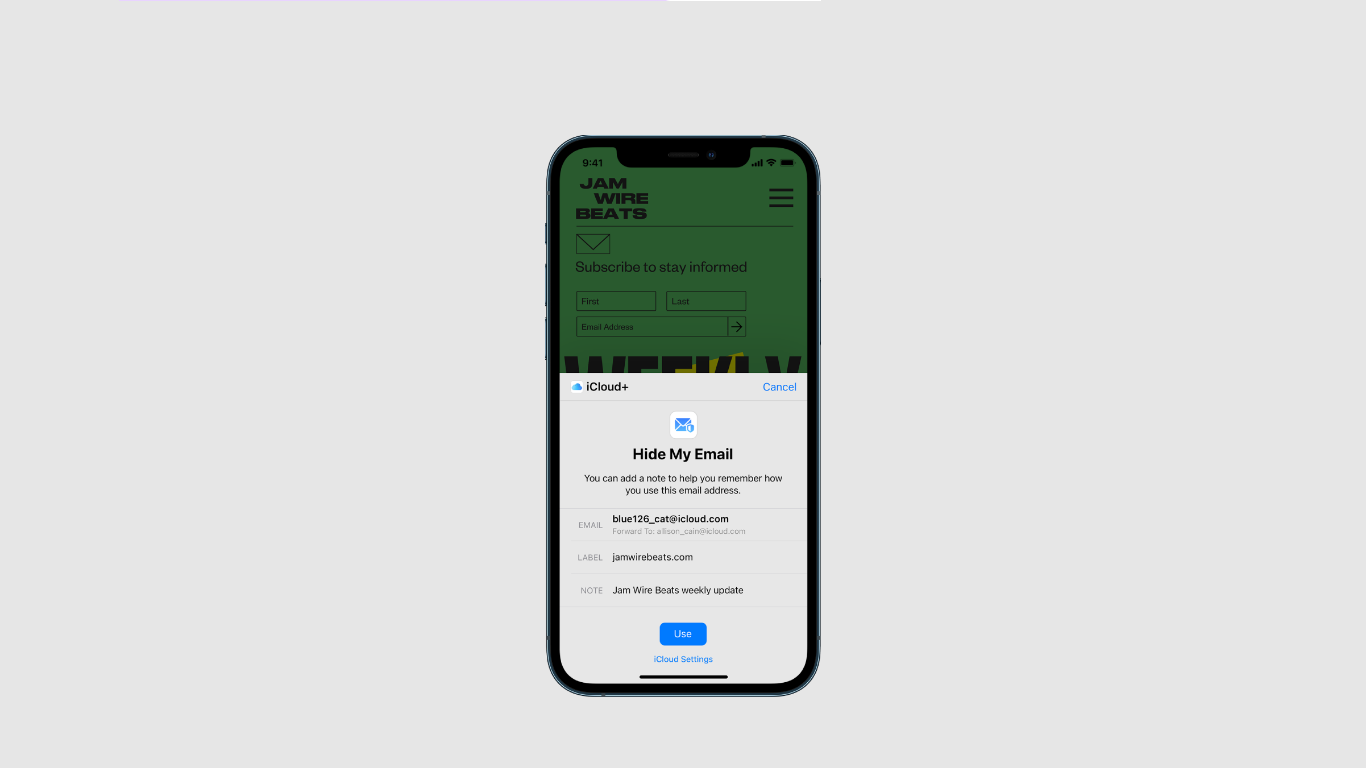
So, basically, when you open any website on Safari and it asks you to create an account, you will see the “Hide My Email” option when you select the email option in the sign-up form.

When you select this option, a new random and unique email address will be created. Here, you will also see to which email address it will forward messages to.

You will be able to label that particular email and add a note as well.
Now hit the continue button and the generated disposable email will be saved to your Hide My Email section.
It is that easy.
Options #2: How to Create Disposable Emails on iPhone Using Hide My Email – Direct on the Apps
Apple enables this feature when you use an application that has a “Sign In with Apple” option. For example, I have used Dropbox.
When I opened the app, I selected the option to “Create an account.”
On the next page, I tap on the “Sign in with Apple” option.

Here, you can choose to share your email or use the “Hide My Email” option. This means if you don’t have an iCloud+ subscription, you have to select the “Share My Email” option.

Now, you will have to select “Continue with Passcode,” enter the passcode and the the signing in process will begin.

Once it is completed, you will be logged in with a random unique email address.

Now you just need to hit “Create a new account” and you are done.
Option #3: How to Create Unlimited Disposable Emails on iOS – Hide My Email in Settings
If you are not using Safari or an application that has “Sign in with Apple,” you can still create such random and unique email addresses within the setting app.
For example, if you wish to register a new account on Facebook on desktop, you can create a disposable email within iPhone Settings and also at www.iCloud.com/settings.
Open the Facebook homepage and hit the sign-up option.
Now open Hide My Email in your iPhone Settings (Settings => Your Apple ID Profile => iCloud => Hide My Email).
You will see an option that says “Create New Address.”

When you tap on it, a new random email address will be created.

You can label it as you want. And then, hit the “Next” button.
Now the new disposable email address is set and you can use it on multiple websites as well.

When you don’t want to receive emails from these disposable email addresses, you can deactivate them as well.


